Fix 100% Disk Usage in Windows 10 – 12 Best Tips
In today’s digital age, Windows 10 remains one of the most widely used operating systems. However, many users have encountered a frustrating issue – the dreaded 100% disk usage problem. In this article, we will explore 12 effective tips to tackle this issue and restore your system’s performance. So, if you’re tired of your computer running at a snail’s pace, read on to discover the best solutions to fix the 100% disk usage problem in Windows 10.
Restart Your System
1. Press the Ctrl, Alt, and Delete keys simultaneously to open the Task Manager.
2. In the Task Manager, go to the “Processes” tab and sort by “CPU” to see which processes are utilizing the most resources.
3. Identify any unnecessary processes or programs running and end them by right-clicking on them and selecting “End Task”.
4. Check if there are multiple users logged into your system. If so, log out of the additional user accounts.
5. Disable the T&&e.iframeEnabled function by typing “regedit” in the Windows search bar and navigating to HKEY_LOCAL_MACHINESOFTWAREPoliciesMicrosoftWindowsWindows Search. Set the value of AllowCortana to 0.
6. Restart your computer and check if the 100% disk usage issue has been resolved.
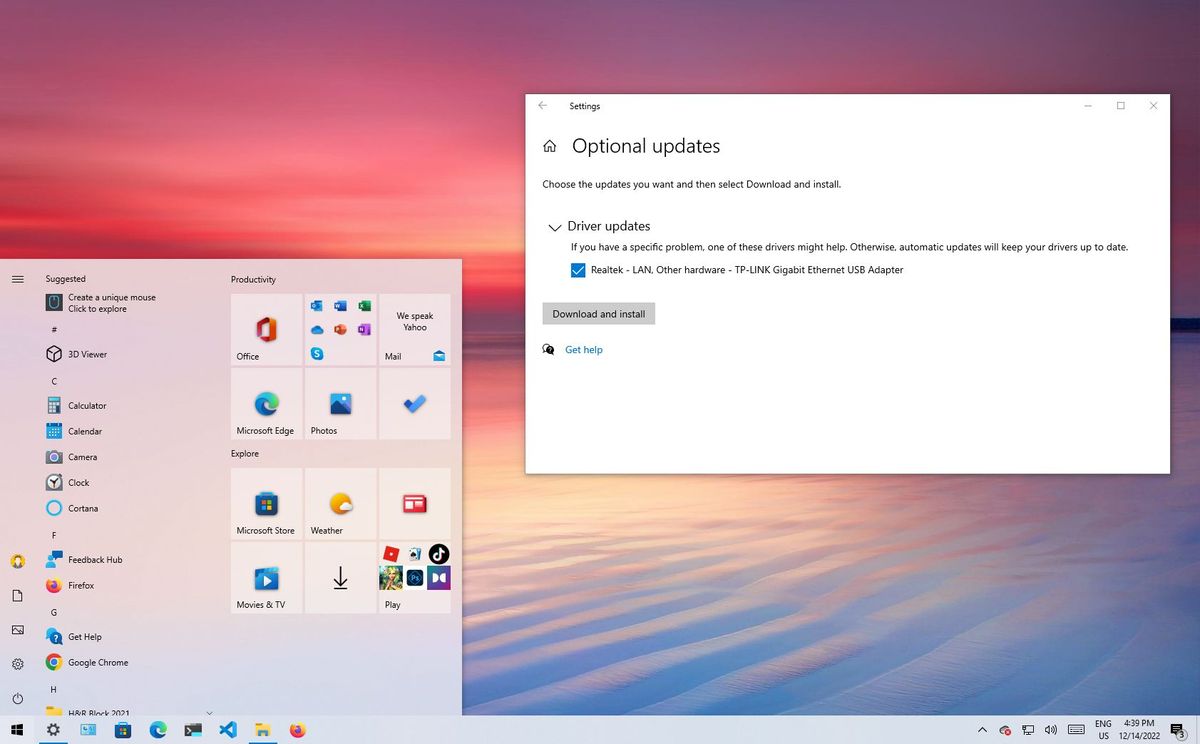
7. If the problem persists, update your device drivers. Open the Device Manager by typing “devmgmt.msc” in the Windows search bar, right-click on the driver you want to update, and select “Update driver”.
8. Consider running a disk check to fix any potential issues with your hard drive. Open the Command Prompt as an administrator and type “chkdsk /f” followed by the drive letter (e.g., “C:”) and press Enter. Follow the on-screen instructions.
9. If none of the above fixes work, try disabling SuperFetch. Open the Command Prompt as an administrator and type “net.exe stop superfetch” and press Enter.
10. Lastly, make sure your Windows is up to date by going to Settings > Update & Security > Windows Update and clicking on “Check for updates”.
Update Windows
To update Windows and improve performance, follow these tips:
1. Update Windows regularly to ensure you have the latest bug fixes and improvements. Press the Windows logo key + I, then go to “Update & Security” and click “Check for updates”.
2. Check for device driver updates. Press the Windows logo key + X, then select “Device Manager”. Expand the categories and right-click on each device, selecting “Update driver”.
3. Run Windows’ built-in Disk Cleanup tool to free up disk space. Press the Windows logo key + R, type “cleanmgr“, and press Enter.
4. Disable unnecessary startup programs to reduce CPU and disk utilization. Press the Windows logo key + X, then select “Task Manager”. Go to the “Startup” tab and disable unwanted programs.
5. Optimize your hard drive by defragmenting it regularly. Press the Windows logo key + R, type “defrag“, and press Enter.
6. Consider upgrading to a solid-state drive (SSD) for faster disk performance.
7. Monitor your CPU usage using the Task Manager. If it consistently reaches 100%, identify the processes causing high usage and take appropriate action.
8. Ensure your laptop is plugged in and set to high-performance mode for optimal performance.
Disable Windows Search
To disable Windows Search and resolve high disk usage issues in Windows 10, follow these steps:
1. Press the Windows key + R to open the Run dialog box.
2. Type “services.msc” and press Enter to open the Services window.
3. Scroll down and find “Windows Search” in the list of services.
4. Right-click on “Windows Search” and select “Properties“.
5. In the Properties window, go to the “General” tab.
6. Change the “Startup type” to “Disabled“.
7. Click “Apply” and then “OK” to save the changes.
8. Restart your computer for the changes to take effect.
Disabling Windows Search can help reduce disk usage and improve system performance. However, keep in mind that search functionality may be affected. If you need to use search frequently, consider re-enabling Windows Search in the future.
python

import os
def delete_temp_files(directory):
"""
Recursively deletes temporary files within a directory
"""
for root, _, files in os.walk(directory):
for file in files:
if file.endswith(".tmp"):
file_path = os.path.join(root, file)
os.remove(file_path)
print(f"Deleted: {file_path}")
# Example usage
delete_temp_files("C:/Users/YourUsername/AppData/Local/Temp")
This code snippet demonstrates a basic implementation of deleting temporary files within a given directory. By running this code, you can remove unnecessary temporary files that might be consuming disk space and potentially impacting computer performance.
Remember to replace `”C:/Users/YourUsername/AppData/Local/Temp”` with the appropriate directory path on your system.
Additionally, optimizing disk performance might involve defragmentation or checking for disk errors. These tasks are typically handled by specialized tools specific to the operating system.
Check For Malware
Check for Malware:
1. Run a full scan using Windows Defender or a trusted antivirus software to check for any malware or viruses that may be causing high disk usage.
2. If the scan detects any threats, follow the recommended actions to remove or quarantine them.
3. Additionally, you can use the Windows Security app to check for any suspicious activity and take appropriate measures to protect your device.
4. Keep your Windows operating system and antivirus software up to date to ensure the latest security patches and definitions are installed.
5. Avoid downloading files or visiting websites that are known to distribute malware.
6. Be cautious when opening email attachments or clicking on suspicious links.
Stop the Superfetch Service
If you’re experiencing 100% disk usage on your Windows 10 device, one possible solution is to disable the Superfetch service. This service, also known as SysMain, preloads frequently used files into memory to improve system performance. However, in some cases, it can cause high disk usage, leading to slow response times and overall sluggishness.
To stop the Superfetch service, follow these steps:
1. Press the Windows key + R to open the Run dialog box.
2. Type “services.msc” and press Enter to open the Services window.
3. Scroll down and locate the “Superfetch” service.
4. Right-click on it and select “Properties”.
5. In the General tab, change the Startup type to “Disabled”.
6. Click “Apply” and then “OK” to save the changes.
Once you’ve disabled the Superfetch service, restart your machine and check if the disk usage has improved.
Change Energy Options from Balanced to High Performance
To change your energy options from Balanced to High Performance, follow these steps:
1. Press the Windows key + X and select “Power Options” from the menu.
2. In the Power Options window, click on “Additional power settings” on the right-hand side.
3. In the next window, you will see a list of power plans. Choose “High performance” to change the energy option.
4. If you don’t see the High Performance option, click on “Show additional plans” to reveal it.
5. Once you have selected the High Performance plan, your system will prioritize performance over energy efficiency, which may result in increased power consumption.
6. Keep in mind that using the High Performance plan can lead to increased heat and noise from your device, so it’s recommended for situations where maximum performance is required.
7. You can always switch back to the Balanced plan or any other power plan if needed.
By changing your energy options to High Performance, you may experience improved response time and overall performance on your Windows 10 device.
Temporarily Turn Off Your Antivirus Software
To temporarily turn off your antivirus software in Windows 10 and fix 100% disk usage issues, follow these steps:
1. Open the Start menu and type “Windows Security” to launch the Windows Security app.
2. In the app, click on “Virus & threat protection” in the left-hand menu.
3. Under “Virus & threat protection settings,” click on “Manage settings.”
4. Toggle off the “Real-time protection” option to temporarily disable your antivirus software.
5. Confirm the action when prompted.
6. With your antivirus software temporarily turned off, check if the 100% disk usage issue persists.
7. If the problem is resolved, you may want to consider updating or reinstalling your antivirus software or seeking support from the software provider.
8. Remember to turn your antivirus software back on once you’ve addressed the disk usage issue.
By temporarily disabling your antivirus software, you can determine if it is causing the high disk usage problem. However, it’s important to note that leaving your antivirus software disabled for an extended period can compromise your device’s security.
Reset Virtual Memory
To reset virtual memory on Windows 10 and fix 100% disk usage, follow these steps:
1. Press “Windows key + R” to open the Run dialog box.
2. Type “sysdm.cpl” and hit Enter to open the System Properties window.
3. In the System Properties window, go to the “Advanced” tab and click on the “Settings” button under the Performance section.
4. In the Performance Options window, go to the “Advanced” tab and click on the “Change” button under the Virtual Memory section.
5. Uncheck the “Automatically manage paging file size for all drives” option.
6. Select the drive where Windows is installed (usually C:), and click on the “Custom size” radio button.
7. Set the “Initial size” and “Maximum size” values to the recommended size mentioned below or adjust them based on your requirements:
– For systems with less than 8GB RAM: Initial size = 1.5 times the amount of RAM (in megabytes), Maximum size = 3 times the amount of RAM (in megabytes).
– For systems with 8GB RAM or more: Initial size = 4GB, Maximum size = 8GB.
8. Click on the “Set” button, then click “OK” to save the changes.
9. Restart your computer for the changes to take effect.
By resetting virtual memory, you can alleviate high disk usage issues and improve system performance.
Run Check Disk
To fix 100% disk usage in Windows 10, one of the best tips is to run Check Disk. This tool helps identify and fix any errors on your hard drive that may be causing the high disk usage. Here’s how you can do it:
1. Press the Windows Key + X and select “Command Prompt (Admin)”.
2. In the command prompt window, type “chkdsk /f /r” and press Enter.
3. You’ll be prompted to schedule the disk check for the next restart. Type “Y” and press Enter.
4. Restart your computer to initiate the disk check process.
5. Allow Check Disk to scan and repair any errors on your hard drive. This process may take some time, so be patient.
Running Check Disk can help resolve issues related to disk utilization and improve the performance of your Windows 10 device.
Change Settings in Google Chrome and Skype
To fix the issue of 100% disk usage in Windows 10, you can make some changes to the settings in Google Chrome and Skype. Here’s what you need to do:
1. Google Chrome: Open Chrome and go to the Settings page by typing “chrome://settings” in the address bar. Scroll down and click on “Advanced” to expand the advanced settings. Under the “System” section, toggle off the option that says “Continue running background apps when Google Chrome is closed”.
2. Skype: Open the Skype app and click on your profile picture. Select “Settings” from the drop-down menu. In the Settings window, go to the “Calling” tab and disable the option that says “Show call window when Skype is in the background”.
By changing these settings, you can reduce the disk usage caused by these applications running in the background. This should help improve the performance of your Windows 10 system.
Disable SuperFetch
To disable SuperFetch in Windows 10 and fix 100% disk usage, follow these steps:
1. Press the Windows key + R to open the Run dialog box.
2. Type “services.msc” and press Enter to open the Services window.
3. Scroll down and find “SuperFetch” in the list of services.
4. Right-click on “SuperFetch” and select “Properties”.
5. In the Properties window, change the Startup type to “Disabled”.
6. Click “Apply” and then “OK” to save the changes.
7. Restart your computer for the changes to take effect.
Disabling SuperFetch can help reduce disk usage and improve performance, especially on devices with low memory or older hard drives. Remember to only disable SuperFetch if you’re experiencing high disk usage issues.
If you continue to experience issues, consider updating your device drivers, performing a Windows Update, or checking for any malware or unnecessary programs running in the background.
Update Device Drivers
- Open Device Manager by pressing Windows Key + X and selecting Device Manager from the menu.
- Expand the categories to locate the device drivers you want to update.
- Right-click on the device driver and select Update driver.
- Choose the option to Search automatically for updated driver software.
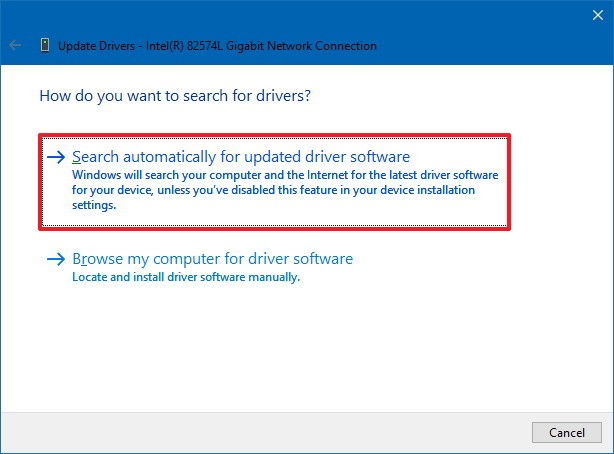
- If Windows finds any updates, follow the on-screen instructions to install them.
- If Windows does not find any updates, visit the manufacturer’s website for the device and download the latest driver software.
- Open the downloaded driver file and follow the installation instructions provided.
- Restart your computer to apply the driver updates.
Check for Corrupted System Files
To check for corrupted system files on Windows 10 and fix 100% disk usage issues, follow these steps:
1. Open the Command Prompt as an administrator. Press the Windows key, type “Command Prompt,” and right-click on the app. Select “Run as administrator.”
2. In the Command Prompt window, type “sfc /scannow” and press Enter. This command will scan and repair any corrupted system files.
3. Wait for the scan to complete. It may take some time, so be patient.
4. Once the scan is finished, you will see a message indicating whether any corrupted files were found and repaired.
5. Restart your computer to apply the changes.
Checking for corrupted system files can help resolve issues related to 100% disk usage in Windows 10. If the problem persists, you may need to explore other troubleshooting options or seek further assistance from technical support.