Disable Microsoft Software Protection Platform Service
Unlocking the full potential of your computer often requires tweaking its settings and disabling unnecessary services. In this article, we’ll explore how to effortlessly disable the Microsoft Software Protection Platform Service, allowing you to take control of your system and optimize its performance.
Understanding Microsoft Software Protection Platform Service
To disable Microsoft Software Protection Platform Service (SPPSVC) on your Windows computer, follow the steps below:
1. Open the Task Manager by pressing Ctrl + Shift + Esc.
2. Go to the “Services” tab in the Task Manager.
3. Look for the “Software Protection” or “SPPSVC” service in the list.
4. Right-click on the service and select “Open Services.”
5. In the Services window, locate the “Software Protection” or “SPPSVC” service again.
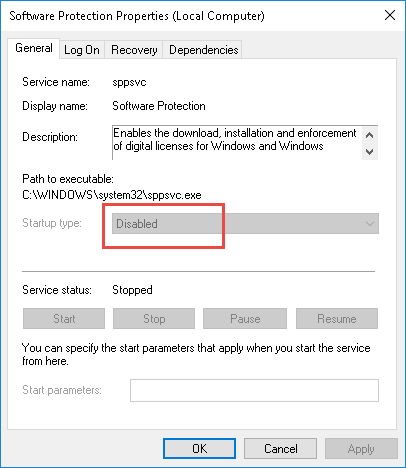
6. Right-click on the service and select “Properties.”
7. In the Properties window, go to the “General” tab.
8. Change the “Startup type” to “Disabled.”
9. Click on “Apply” and then “OK” to save the changes.
10. Restart your computer for the changes to take effect.
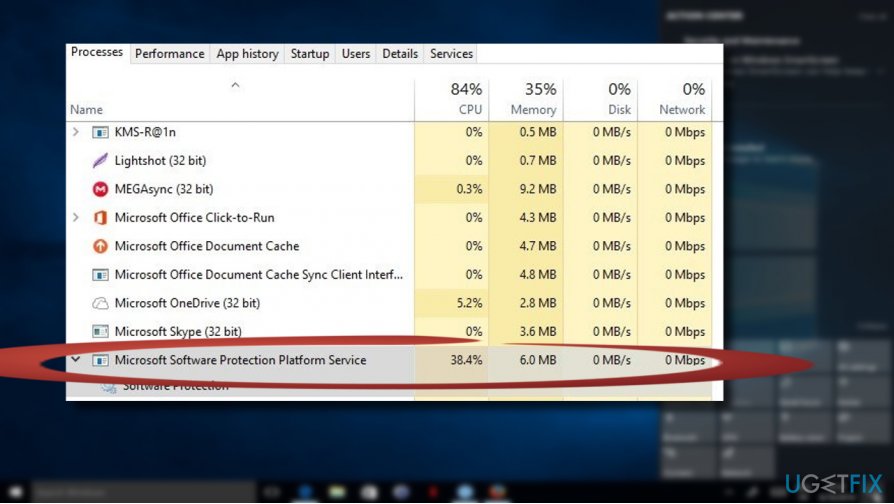
Causes of High CPU Usage by SPPSVC Service
The SPPSVC service, also known as the Microsoft Software Protection Platform Service, may sometimes cause high CPU usage on your Windows PC. This can be due to several factors such as software tampering, licensing issues, or even a problem with the service itself.
To address this issue and reduce the CPU usage, you can disable the SPPSVC service by following these steps:
1. Press the Windows key + R to open the Run dialog box.
2. Type “services.msc” and hit Enter to open the Services window.
3. Scroll down and locate the “Software Protection” service.
4. Right-click on it and select “Properties”.
5. In the General tab, change the Startup type to “Disabled”.
6. Click on “Apply” and then “OK” to save the changes.
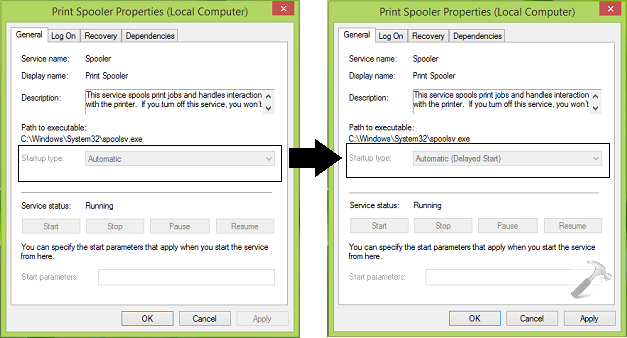
Disabling the SPPSVC service should help alleviate the high CPU usage. However, keep in mind that this may affect the licensing and activation of certain Microsoft products on your PC. If you encounter any issues, you can always re-enable the service by following the same steps and changing the Startup type to “Automatic”.
Methods to Fix High CPU Usage Caused by SPPSVC.exe
- Open Task Manager by pressing Ctrl+Shift+Esc
- Click on the Services tab
- Scroll down and locate SPPSVC.exe in the list of services
- Right-click on SPPSVC.exe and select Properties
- In the Properties window, go to the General tab
- Change the Startup type to Disabled
- Click on Apply and then OK
- Restart your computer to apply the changes
Troubleshooting Steps for SPPSVC High CPU Usage
- Restart the SPPSVC service to see if the high CPU usage persists.
- Ensure that all Windows updates are installed as outdated software can cause such issues.
- Check for malware or viruses that might be affecting the SPPSVC service.
- Try disabling any recently installed software or applications that could be conflicting with SPPSVC.
- Reset the Windows Update components to resolve any potential conflicts.
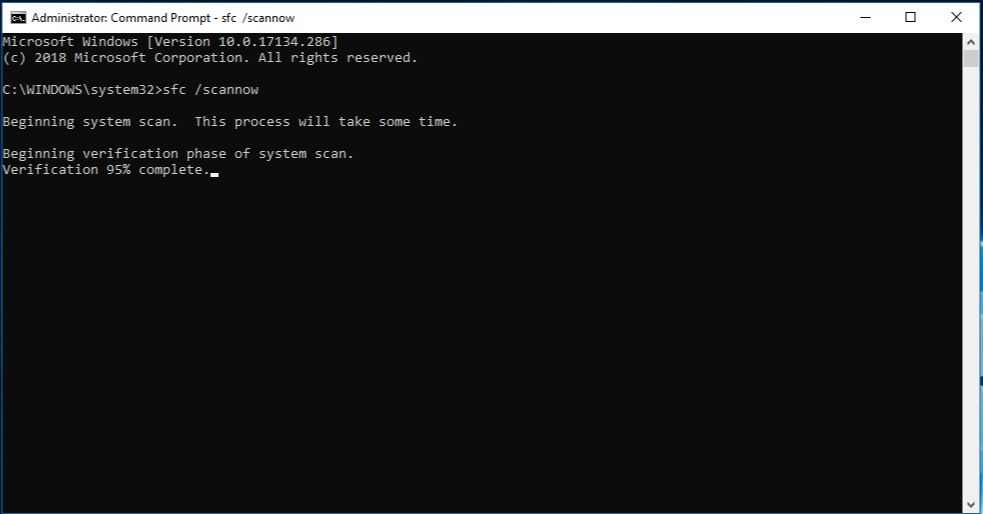
- Scan your system for any corrupt or damaged system files using the System File Checker tool.
- Update your device drivers, particularly those related to software protection, to ensure compatibility.
- Disable unnecessary startup programs that could be hogging system resources.
- Perform a clean boot to troubleshoot any third-party software interference.
- If all else fails, consider disabling the Microsoft Software Protection Platform Service altogether, but proceed with caution as it may affect the activation and functionality of Microsoft products.
Steps to Disable SPPSVC Service
To disable the Microsoft Software Protection Platform Service (SPPSVC) on your Windows 10 PC, follow these steps:
1. Press the Windows key + R to open the Run dialog box.
2. Type “services.msc” and press Enter to open the Services window.
3. Scroll down and find the “Software Protection” service.
4. Right-click on the service and select “Properties”.
5. In the Properties window, go to the “General” tab.
6. Change the “Startup type” to “Disabled”.
7. Click on “Apply” and then “OK” to save the changes.
8. Restart your computer for the changes to take effect.
Disabling the SPPSVC service can help resolve issues related to high CPU usage, errors, and software tampering. However, keep in mind that disabling this service may also affect the functionality of certain Microsoft products, such as Office and Windows licensing. If you encounter any problems after disabling the service, you can re-enable it using the same steps.
Updating Windows for Resolving SPPSVC Issues
To resolve SPPSVC issues, disabling the Microsoft Software Protection Platform Service can be a helpful solution. Here’s how you can do it:
1. Open the Run dialog box by pressing the Windows key + R.
2. Type “services.msc” and hit Enter to open the Services window.
3. Scroll down and locate “Software Protection” in the list of services.
4. Right-click on “Software Protection” and select “Properties.”
5. In the Properties window, go to the “General” tab.
6. Change the “Startup type” to “Disabled.”
7. Click “Apply” and then “OK” to save the changes.
8. Restart your computer for the changes to take effect.
Disabling the Microsoft Software Protection Platform Service can help resolve SPPSVC-related issues such as high CPU usage, error codes, or disk errors. However, keep in mind that this may affect the licensing of Microsoft products on your system. If you encounter any issues, you can re-enable the service by following the same steps and changing the “Startup type” to “Automatic” or “Manual.”
Restoring Windows Using System Restore
Restoring Windows using System Restore is a useful feature when you encounter issues with Microsoft Software Protection Platform Service. To disable this service, follow these steps:
1. Press the Windows key + R to open the Run dialog box.
2. Type “services.msc” and press Enter to open the Services window.
3. Scroll down and locate “Software Protection” in the list of services.
4. Right-click on “Software Protection” and select “Properties.”
5. In the Properties window, click on the “General” tab.
6. Under the Startup type section, select “Disabled.”
7. Click “Apply” and then “OK” to save the changes.
By disabling the Software Protection service, you can resolve issues related to Microsoft Software Protection Platform Service. Remember to enable it again if needed.
Please note that this solution is specific to disabling the service and may not address other factors that could contribute to the problem.
Resetting Windows to Resolve SPPSVC Problems
To resolve SPPSVC problems in Windows, you can try resetting the operating system. Resetting Windows can help fix various issues related to the Software Protection Platform Service.
Here’s how you can reset Windows to resolve SPPSVC problems:
1. Open the Settings app: Press Windows + I to open the Settings app.
2. Go to Update & Security: In the Settings app, click on Update & Security.
3. Click on Recovery: In the left-hand menu, click on Recovery.
4. Choose Reset this PC: Under the Reset this PC section, click on Get started.
5. Follow the on-screen instructions: Windows will guide you through the reset process. Make sure to select the option to keep your files if you don’t want to lose any personal data.
Resetting Windows can help resolve SPPSVC problems and improve the performance of your system. Remember to back up your important files before proceeding with the reset.