HP Printer Offline – Troubleshooting and Fixing Error on Windows
Having trouble with your HP printer going offline on your Windows device? Look no further! This guide will provide you with troubleshooting tips and solutions to fix this common error.
Troubleshooting printer connectivity issues

First, ensure that your printer is powered on and connected to your computer or network. Check that the printer cables are securely plugged in and that there are no loose connections. If you are using a wireless printer, make sure it is connected to your Wi-Fi network.
Next, check the printer status on your Windows device. Open the Control Panel and navigate to “Devices and Printers”. Look for your HP printer in the list of devices and check if it is listed as “offline”. If it is, right-click on the printer and select “Set as default printer” to bring it back online.
If your printer is still offline, try restarting both your printer and your computer. Sometimes, a simple restart can resolve connectivity issues.
If the issue persists, check the printer queue for any stuck print jobs. Open the Control Panel again and go to “Devices and Printers”. Right-click on your HP printer and select “See what’s printing”. This will open the printer queue. If there are any pending print jobs, right-click on them and select “Cancel” to clear the queue. This can help resolve any spooling issues that may be causing the printer to go offline.
Another troubleshooting step is to update your printer driver. Visit the HP website and search for your specific printer model. Look for the latest driver for your Windows operating system and download it. Once downloaded, run the installer and follow the on-screen instructions to update the driver. A outdated or incompatible driver can sometimes cause printer connectivity issues.
If updating the driver doesn’t solve the problem, try removing and re-adding your printer. Go to the Control Panel, then “Devices and Printers”. Right-click on your HP printer and select “Remove device”. Once removed, click on “Add a printer” and follow the prompts to reinstall your printer. This can help refresh the printer settings and resolve any configuration issues.
If you are still experiencing issues, check your firewall and antivirus settings. Sometimes, these security measures can block the printer from connecting to your computer. Temporarily disable your firewall and antivirus software and see if the printer comes online. If it does, you may need to adjust the settings to allow the printer to communicate with your computer.
In some cases, a software conflict may be causing the printer connectivity issue. Try booting your computer in safe mode and see if the printer works. If it does, there may be a conflicting program or service running in the background. Disable startup programs or services one by one to pinpoint the cause of the issue.
If none of these troubleshooting steps resolve the printer connectivity issue, it may be helpful to contact HP support for further assistance. They can provide additional guidance and help you resolve the issue.
Resolving printer offline status
![]()
Troubleshooting and Fixing Error: HP Printer Offline on Windows
If your HP printer is showing an offline status on your Windows computer, there are a few steps you can take to resolve the issue. Follow these troubleshooting tips to get your printer back online and printing smoothly.
1. Check the printer connections:
– Ensure that the printer is properly connected to your computer via USB or network connection.
– Verify that the power cable is securely plugged into the printer and an electrical outlet.
– Make sure that there are no loose or damaged cables.
2. Set the printer as the default printer:
– Press the Windows key + R to open the Run dialog box.
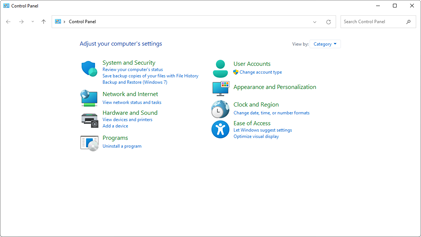
– Type “control” and press Enter to open the Control Panel.
– Go to “Devices and Printers” or “Printers and Scanners” (depending on your Windows version).
– Right-click on your HP printer and select “Set as default printer”.
– Close the Control Panel and check if the printer is now online.
3. Restart the print spooler service:
– Press the Windows key + R to open the Run dialog box.
– Type “services.msc” and press Enter to open the Services window.
– Scroll down and find the “Print Spooler” service.
– Right-click on it and select “Restart”.
– Close the Services window and check if the printer is now online.
4. Update or reinstall the printer driver:
– Visit the HP support website and search for your printer model.
– Download the latest driver software for your printer.
– Open the downloaded file and follow the on-screen instructions to install the driver.
– Alternatively, you can right-click on your printer in the Control Panel, select “Remove device”, and then reconnect the printer to let Windows automatically reinstall the driver.
5. Disable the “Use Printer Offline” setting:
– Press the Windows key + R to open the Run dialog box.
– Type “control” and press Enter to open the Control Panel.
– Go to “Devices and Printers” or “Printers and Scanners” (depending on your Windows version).
– Right-click on your HP printer and uncheck the “Use Printer Offline” option.
– Close the Control Panel and check if the printer is now online.
6. Restart your computer and printer:
– Close all open programs and save your work.
– Shut down your computer and unplug the power cord from your printer.
– Wait for a few minutes, then plug the power cord back into the printer.
– Turn on your computer and check if the printer is now online.
If none of these steps resolve the printer offline issue, you may need to contact HP support for further assistance. They can provide more specific troubleshooting steps or guide you through any necessary repairs.
Fixing the “HP Printer Offline” problem
First, ensure that your printer is turned on and properly connected to your computer. Check all cables and make sure they are securely plugged in. If you are using a wireless printer, ensure that it is connected to your Wi-Fi network.
Next, check the printer’s status on your computer. Go to the Control Panel and navigate to the “Devices and Printers” section. Look for your HP printer and see if it is showing as “Offline.” If it is, right-click on the printer and select “Set as default printer.” This should bring the printer back online.
If the above step doesn’t resolve the issue, you can try restarting both your computer and the printer. Sometimes, a simple restart can fix connectivity problems and get your printer back online.
If the problem persists, you can try reinstalling the printer driver. To do this, go to the HP website and download the latest driver for your printer model. Once downloaded, open the installer and follow the on-screen instructions to reinstall the driver. This will replace any corrupted or outdated files that may be causing the “HP Printer Offline” error.
In some cases, the issue may be related to the print spooler service. The print spooler is a software program that manages print jobs sent to the printer. If the print spooler service is not running or is experiencing issues, it can cause the printer to go offline.
To fix this, you can restart the print spooler service. Press the Windows key + R to open the Run dialog box, then type “services.msc” and hit Enter. In the Services window, scroll down and find the “Print Spooler” service. Right-click on it and select “Restart.” This will restart the print spooler service and may resolve the “HP Printer Offline” problem.
If none of the above steps work, you can try resetting your printer. To do this, turn off the printer and unplug it from the power source. Wait for about a minute, then plug it back in and turn it on. This will reset the printer’s settings and may resolve any connectivity issues.
It’s also worth checking for any software conflicts that may be causing the “HP Printer Offline” error. Disable any antivirus or firewall software temporarily and see if the printer comes back online. If it does, you may need to adjust the settings of your security software to allow the printer to communicate with your computer.
Tips to get your printer back online
- Check Connection
- Make sure the printer is properly connected to the power source.
- Ensure that the USB or Ethernet cable is securely connected to both the printer and the computer.
- If using a wireless printer, verify that it is connected to the Wi-Fi network and the signal strength is strong.
- Restart Devices
- Turn off the printer and unplug it from the power source.
- Shut down the computer and disconnect it from the power source.
- Wait for a few minutes and then plug in and turn on both the printer and the computer.
- Update Printer Driver
- Open the Start menu and search for Device Manager.
- Expand the Print queues category.
- Right-click on the printer driver and select Update driver.
- Choose the Search automatically for updated driver software option and follow the on-screen instructions.
- Set Printer as Default
- Open the Control Panel from the Start menu.
- Go to Devices and Printers or Printers and Scanners.
- Right-click on the printer and select Set as default printer.
- Clear Print Spooler
- Press Windows Key + R to open the Run dialog box.
- Type services.msc and hit Enter.
- Scroll down and locate the Print Spooler service.
- Right-click on it and select Stop.
- Open File Explorer and navigate to C:WindowsSystem32spoolPRINTERS.
- Delete all files in the PRINTERS folder.
- Go back to the Services window, right-click on the Print Spooler service, and select Start.