How to Fix Windows 10 Installation Issues
Troubleshooting the installation process of Windows 10 can sometimes be a challenging endeavor. In this article, we will explore effective solutions to address common installation issues, ensuring a smooth and hassle-free experience with the operating system.
Troubleshooting common installation issues
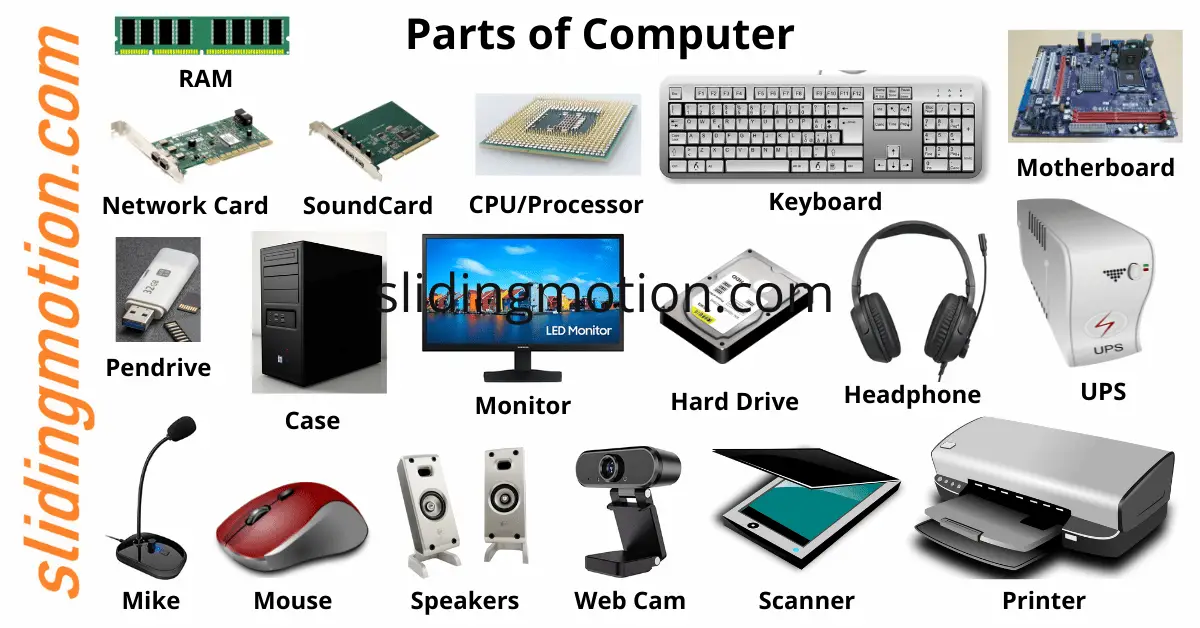
1. Disconnect peripherals: Before starting the installation process, disconnect any unnecessary peripherals such as printers, scanners, or external hard drives. This can help eliminate compatibility issues that may be causing installation errors.
2. Verify your hardware: Ensure that your PC meets the minimum system requirements for Windows 10. Check the Microsoft website for the specific requirements.
3. Clean install: If you’re experiencing persistent installation issues, consider performing a clean install of Windows 10. This involves wiping the hard drive and reinstalling the operating system. Make sure to back up your important files before proceeding.
4. Update your system: Ensure that your current Windows version is up to date with the latest updates and patches. This can help resolve compatibility issues and improve the installation process.
5. Resolve error codes: If you encounter specific error codes during the installation, search for their meanings and corresponding solutions on the Microsoft Support website.
Remember, if you’re still experiencing issues, don’t hesitate to reach out to Microsoft Support for further assistance.
Resolving driver errors during Windows 10 installation
1. Disconnect peripherals: To avoid any compatibility issues, unplug all unnecessary devices such as printers or cameras before starting the installation process.
2. Use LAN cable: If you’re experiencing issues with wireless connectivity during installation, try using a LAN cable instead for a more stable connection.
3. Update USB drivers: Ensure your USB drivers are up to date by visiting your device manufacturer’s website and downloading the latest drivers.
4. Use a Microsoft verified app: To prevent any installation errors, download the Windows 10 installation media from the official Microsoft website or use the Microsoft Store.
5. Check your hard drive and partition: Verify that your hard drive has enough space and is properly partitioned before attempting the installation.
6. Fix error code 0x8007025d: If you encounter this error code, try using a different installation media or create a new bootable USB.
Remember, if you encounter any specific error messages or codes during the installation process, consult the Microsoft Support website or seek assistance from the Windows community for further guidance.
Fixing issues with product key prompts
First, make sure you’re entering the product key correctly. Double-check the characters and ensure there are no typos. If you’re still encountering issues, try the following steps:
1. Restart your PC and try entering the product key again.
2. If the issue persists, try performing a clean boot. This will help identify if any third-party software is causing conflicts.
3. If you’re upgrading from a previous version of Windows (such as Windows 7 or Windows 8.1), ensure that your device meets the system requirements for Windows 10.
4. If you’re using a USB installation media, try creating a new one using the Media Creation Tool from Microsoft’s website.
5. If you’re still experiencing issues, reach out to Microsoft Support for further assistance.
By following these steps, you can overcome product key prompt issues and complete your Windows 10 installation smoothly.
powershell

# Define the required variables

$isoPath = "C:pathtowindows10.iso"

$driveLetter = "D"

$computerName = "MyComputer"

$adminPassword = ConvertTo-SecureString -String "StrongPassword" -AsPlainText -Force
# Mount the Windows 10 ISO
$mountResult = Mount-DiskImage -ImagePath $isoPath -PassThru
$volume = $mountResult | Get-Volume
# Format the USB drive
$usbDrive = Get-Disk | Where-Object {$_.OperationalStatus -eq "Online" -and $_.Path -like "*$driveLetter*"} | Get-Partition | Get-PartitionSupportedSize
$usbDrive | Format-Volume -FileSystem NTFS -NewFileSystemLabel "Win10InstallUSB" -Confirm:$false
# Copy Windows 10 files to USB drive
$destination = "{0}:Windows10" -f $driveLetter
Copy-Item -Path "$($volume.DriveLetter):*" -Destination $destination -Recurse -Force
# Unmount the Windows 10 ISO
Dismount-DiskImage -ImagePath $isoPath
# Start the Windows 10 installation process
$unattendXML = @"
"@
$unattendXML | Out-File -FilePath "$($destination)Autounattend.xml" -Encoding ASCII
$installCmd = "$($destination)setup.exe /unattend:$($destination)Autounattend.xml"
Start-Process -FilePath $installCmd -Wait
# Rename the computer and set the administrator password
Rename-Computer -NewName $computerName -Force -Restart
$password = $adminPassword | ConvertFrom-SecureString
Set-LocalUser -Name Administrator -Password $password
# Clean up the USB drive
Remove-Item -Path "$($destination)Autounattend.xml" -Force
Please note that this is just a sample code and should be used with caution. Make sure to adapt the variables and paths to match your specific environment before running it. Additionally, this script assumes you have an ISO file of Windows 10 and a USB drive with enough capacity to hold the installation files.
Troubleshooting installation hanging or continuous reboots
Troubleshooting Installation Hanging or Continuous Reboots
If you’re experiencing installation hanging or continuous reboots during your Windows 10 installation, here are some steps to help you resolve the issue:
1. Check your hardware devices: Make sure all your hardware devices are compatible with Windows 10. If you have any incompatible devices, disconnect them before proceeding with the installation.
2. Check for error messages: If you’re getting specific error messages like “error code 0x8007025d,” “black screen,” or “blue screen,” search for solutions online or consult the Microsoft Support website for troubleshooting steps.
3. Use a verified USB or DVD: If you’re installing Windows 10 from a USB or DVD, ensure that it’s a Microsoft verified app or media driver. Using an official and verified source can help avoid potential installation issues.
4. Update your drivers: Make sure you have the latest drivers for your hardware devices. Visit the manufacturer’s website or use a reliable driver update tool to ensure all your drivers are up to date.
5. Disconnect unnecessary devices: Temporarily disconnect any unnecessary peripherals such as printers, scanners, or external drives during the installation process.
Remember, troubleshooting installation issues can vary depending on your specific situation. If you’re still experiencing problems, it’s advisable to seek further assistance from Microsoft Support or consult their online community for additional advice.
Resolving error codes during installation (0x80070005-0x90002, 0xC1900101-0x20017, -0x30018, -0x20004, etc.)
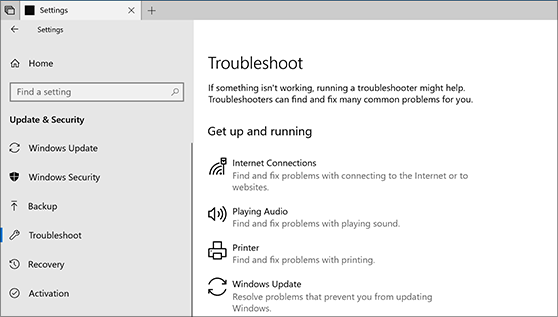
- Run Windows Update Troubleshooter:
- Press Win + I to open the Settings app.
- Select Update & Security and click on Troubleshoot in the left sidebar.
- Choose Windows Update and click on Run the troubleshooter.
- Follow the on-screen instructions to complete the troubleshooting process.
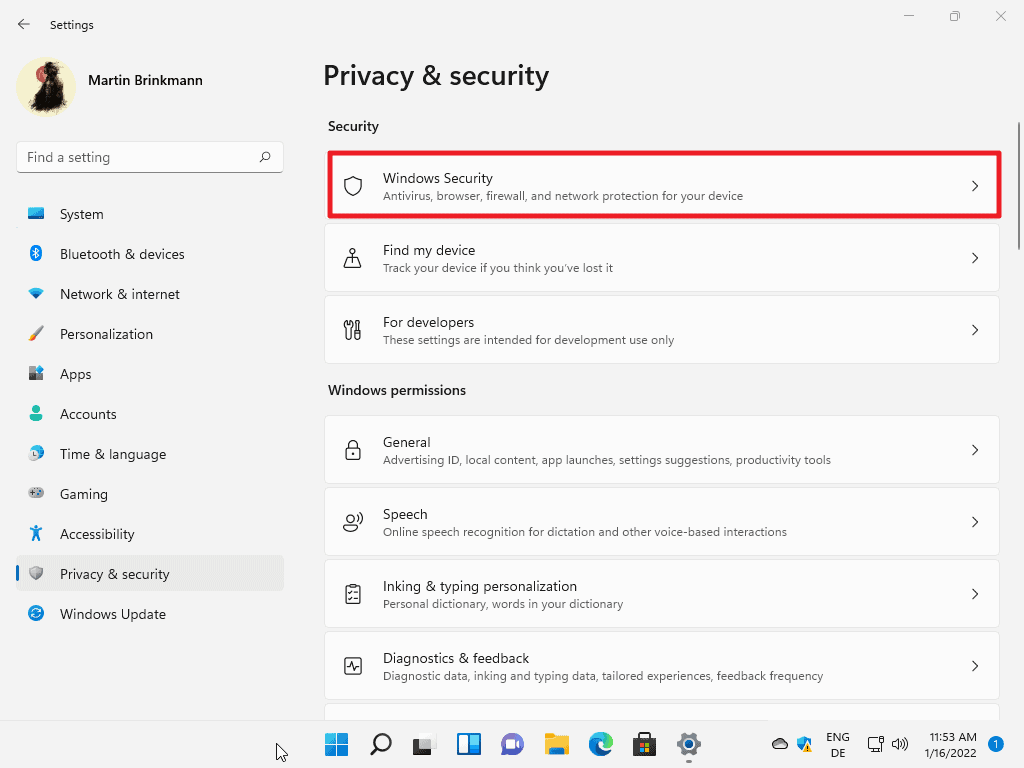
- Disable antivirus software temporarily:
- Right-click on the antivirus icon in the system tray and select Disable or Turn off.
- If you can’t find the option in the system tray, open the antivirus program and look for the disable option within its settings.
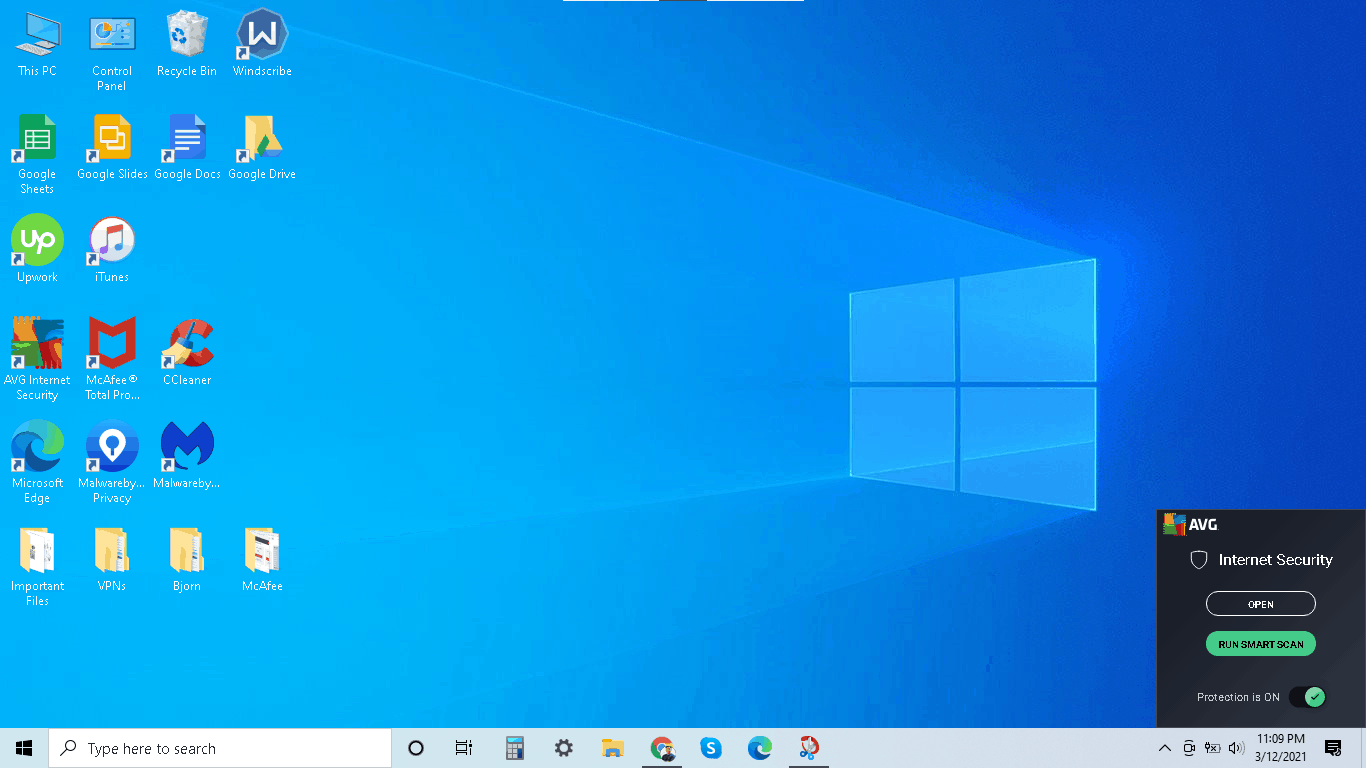
- Once disabled, retry the Windows 10 installation process.
- Perform a clean boot:
- Press Win + R to open the Run dialog box.
- Type msconfig and press Enter.
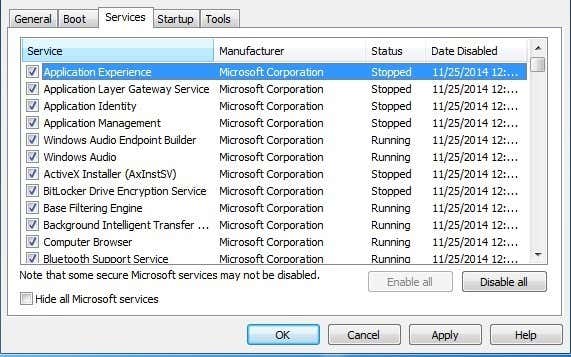
- In the System Configuration window, go to the Services tab.
- Check the box that says Hide all Microsoft services.

- Click on Disable all.
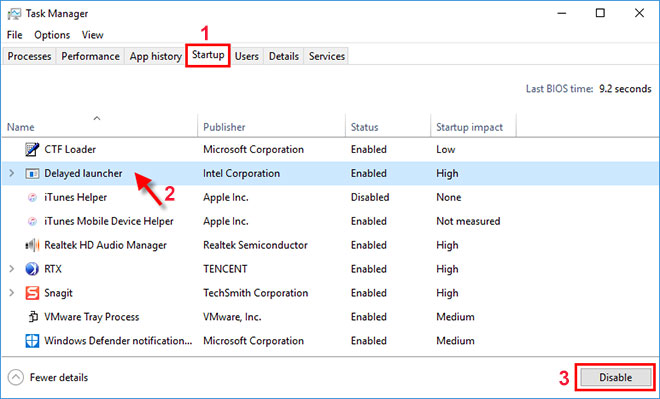
- Go to the Startup tab and click on Open Task Manager.
- Disable all startup items by right-clicking and selecting Disable.
- Close the Task Manager and go back to the System Configuration window.
- Click on Apply and then OK.
- Restart your computer and try installing Windows 10 again.
- Clear temporary files and reset Windows Update components:
- Open Command Prompt as an administrator.
- Type the following commands one by one and press Enter after each:
- net stop wuauserv
- net stop cryptSvc
- net stop bits

- net stop msiserver
- ren C:WindowsSoftwareDistribution SoftwareDistribution.old
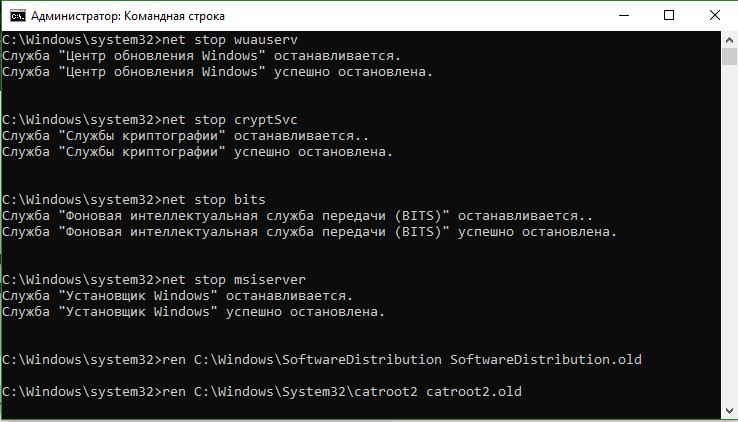
- ren C:WindowsSystem32catroot2 catroot2.old
- net start wuauserv
- net start cryptSvc
- net start bits
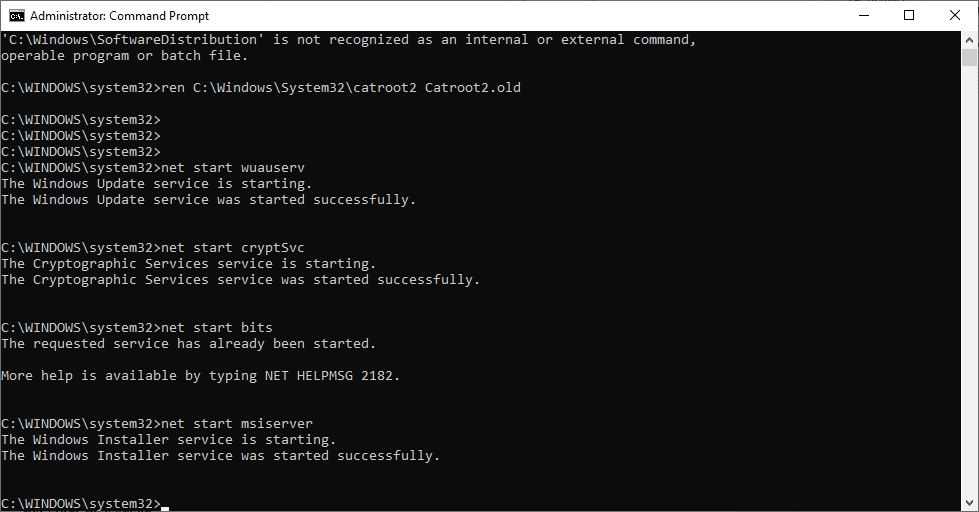
- net start msiserver
- Close the Command Prompt and restart your computer.
- Attempt the Windows 10 installation once again.
- Use the Media Creation Tool:
- Visit the official Microsoft website and download the Media Creation Tool.
- Run the tool and select Upgrade this PC now.
- Follow the on-screen instructions to complete the installation.
Activation problems and ownership of the PC
If you’re experiencing activation problems or issues with ownership of your PC during the Windows 10 installation process, here are some helpful tips to fix them:
1. Check your internet connection and make sure it’s stable. A stable connection is necessary for activating Windows 10.
2. Verify that you have a valid product key for Windows 10. If you upgraded from Windows 7 or Windows 8.1, the product key should have automatically been activated. If not, you may need to enter the product key manually.
3. Ensure that you’re using a genuine copy of Windows 10. Counterfeit or pirated versions may cause activation issues.
4. If you’re still encountering problems, try using the “Activation Troubleshooter” tool provided by Microsoft. This tool can automatically detect and fix activation issues.
Remember, if you’re having trouble with the installation process or encounter any error messages, Microsoft’s support team is always available to assist you.
Troubleshooting video, sound, and other driver issues
1. Update your drivers: Open Device Manager, right-click on the problematic driver, and select “Update driver.” Alternatively, visit the manufacturer’s website and download the latest driver manually.
2. Check for Windows updates: Press the Windows key + I, go to “Update & Security,” and click on “Check for updates.” Install any available updates, as they often include driver fixes.
3. Verify hardware compatibility: Ensure that your hardware meets the minimum requirements for Windows 10. If not, consider upgrading or replacing the incompatible components.
4. Disconnect unnecessary peripherals: Unplug any USB devices, external drives, or additional monitors during the installation process.
5. Use a different installation media: If you’re installing Windows 10 from a USB or DVD, try using a different one to rule out any media-related issues.
6. Resolve common installation errors: If you encounter a black screen, blue screen, or error message like “0x8007025d,” search for the specific error code on the Microsoft Support website for troubleshooting steps.
Remember, if you’re still experiencing issues, don’t hesitate to seek assistance from Microsoft Support or consult the Windows community for additional troubleshooting advice.
Creating a local account during installation
During the Windows 10 installation process, you have the option to create a local account. This allows you to use your computer without signing in with a Microsoft account. To create a local account, follow these steps:
1. Start the Windows 10 installation process.
2. When prompted to sign in with a Microsoft account, select “Create a new account.”
3. On the next screen, select “Local account.”
4. Enter a username and password for your local account.
5. Complete the installation process by following the on-screen instructions.
Creating a local account can be useful for those who prefer not to link their Windows 10 installation to a Microsoft account. It also provides an alternative if you encounter any issues with signing in or if you simply prefer to keep your personal information separate.
Fixing Windows 10 Store startup issues
1. Reset the Microsoft Store cache by pressing the Windows key + R, then typing “wsreset.exe” and pressing Enter. This will clear any corrupt or stuck data.
2. Check for Windows updates by going to Settings > Update & Security > Windows Update. Install any available updates and restart your computer.
3. Ensure that your internet connection is stable and working properly. Try connecting to a different network to see if the issue persists.
4. Run the Windows Store Apps troubleshooter. Press the Windows key + I to open Settings, then go to Update & Security > Troubleshoot > Additional troubleshooters. Select “Windows Store Apps” and follow the on-screen instructions.
If these steps don’t resolve the issue, you may need to reinstall the Microsoft Store. Visit our support page for more detailed instructions on how to do this.
Remember, if you encounter any other issues or have further questions, our support team is here to assist you.
Troubleshooting Windows 10 Mail sync problems
Troubleshooting Windows 10 Mail Sync Problems
If you’re experiencing sync problems with Windows 10 Mail, follow these steps to resolve the issue:
1. Check your internet connection: Ensure you have a stable internet connection before troubleshooting further.
2. Restart Windows 10 Mail: Close the app and reopen it to refresh the sync process.
3. Re-enter account credentials: Sometimes, re-entering your email account credentials can fix sync problems.
4. Update Windows 10 Mail: Make sure you have the latest updates for Windows 10 Mail installed.
5. Remove and re-add the account: Remove your email account from Windows 10 Mail and then add it back again.
6. Reset Windows 10 Mail app: Resetting the app can resolve various syncing issues.
7. Contact support: If the problem persists, reach out to Microsoft support for further assistance.
Remember, troubleshooting steps may vary depending on the specific error message or problem you are encountering. Follow the instructions provided by Windows 10 Mail for more targeted fixes.
Additional general fixes for Windows 10 installation issues
- Perform a clean boot:
- Press Windows Key + R to open the Run dialog box.
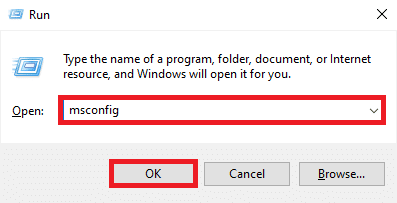
- Type msconfig and press Enter to open the System Configuration window.
- In the General tab, select Selective startup and uncheck Load startup items.
- Go to the Services tab, check the Hide all Microsoft services box, then click Disable all.
- Click Apply and then OK.
- Restart your computer and try installing Windows 10 again.
- Disable antivirus and security software:
- Open your antivirus or security software from the system tray or Start menu.
- Look for options related to real-time protection or scanning, and temporarily disable them.
- Make sure to re-enable the antivirus or security software after the installation is complete.
- Disconnect unnecessary peripherals:
- Disconnect any external devices connected to your computer, such as printers, scanners, USB drives, etc.
- Keep only the essential devices, such as keyboard and mouse, connected during the installation process.
- Update device drivers:
- Press Windows Key + X and select Device Manager from the menu.
- Expand the categories and locate any devices with a yellow exclamation mark.
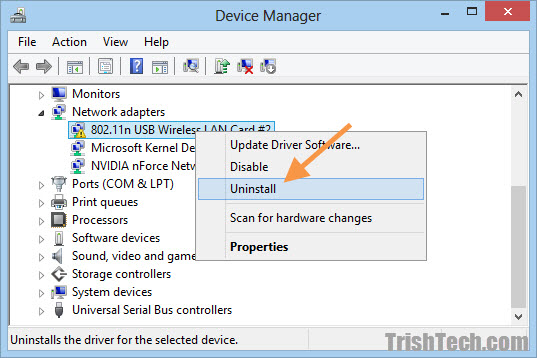
- Right-click on the device and select Update driver.
- Choose the option to automatically search for updated driver software.
- Repeat this process for all devices with an exclamation mark.
- Disconnect from the internet:
- Disconnect your computer from the internet by unplugging the Ethernet cable or turning off Wi-Fi.
- Restart your computer and begin the installation process without an internet connection.
- You can reconnect to the internet once the installation is complete.
Additional resources for further assistance and options
Additional Resources for Windows 10 Installation Issues
| Resource | Description |
|---|---|
| Windows Update Troubleshooter | Official Windows support page providing a step-by-step guide to resolve common Windows update issues. |
| Windows 10 Recovery Options | Information on various recovery options available in Windows 10, including system restore, reset, and advanced startup options. |
| Windows Community Forums | Online community forums where Windows users can seek help, ask questions, and find solutions to installation issues. |
| Windows Release Information | Official Microsoft documentation providing details about the latest Windows 10 updates, known issues, and possible workarounds. |
| Windows 10 ISO Download | Official Microsoft website to download a Windows 10 ISO file, which can be used for clean installations or repair purposes. |