Fix Ethernet Unidentified Network Windows 10/11
Troubleshooting network issues can be a frustrating experience, especially when encountering the dreaded “Ethernet Unidentified Network” error on Windows 10/11. In this article, we delve into effective solutions to fix this perplexing problem, allowing you to regain seamless connectivity and get back to your online endeavors.
Causes of the Ethernet Unidentified Network Problem on Windows
1. IP configuration issues: Incorrect IP address configuration can result in the “Unidentified Network” error.
2. Network adapter driver problems: Outdated or incompatible network adapter drivers can cause connectivity issues.
3. Hardware or cable issues: Faulty Ethernet cables or hardware can lead to the unidentified network problem.
Solutions:
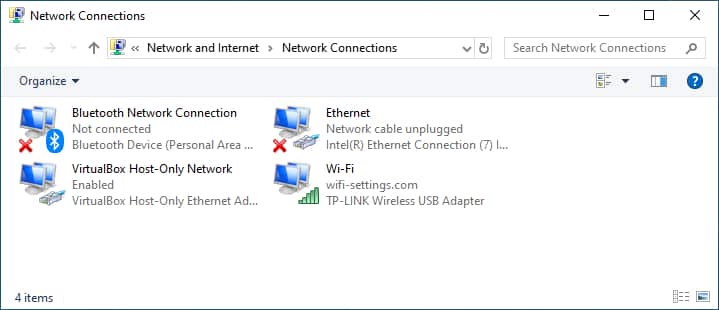
1. Reset network settings: Press Windows Key + X and select “Network Connections.” Right-click on the network adapter and choose “Disable.” Wait a few seconds, then right-click again and select “Enable.”
2. Update network adapter driver: Visit the manufacturer’s website or use automatic driver update software to ensure you have the latest driver.
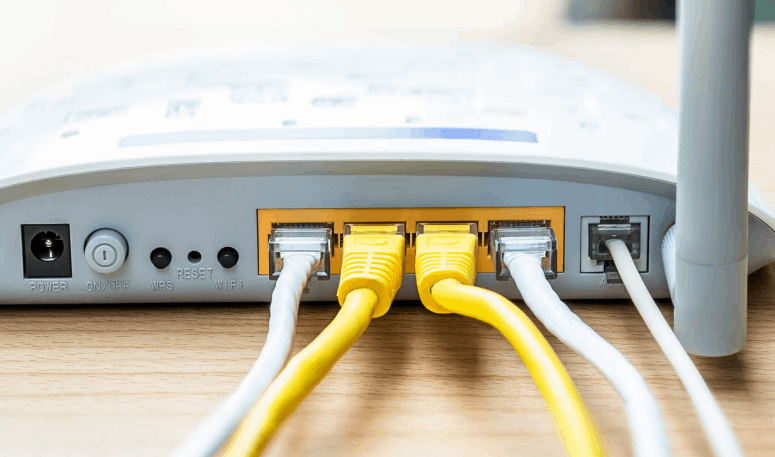
3. Check hardware and cables: Ensure Ethernet cables are securely connected and test with a different cable or port if possible.
Troubleshooting the Unidentified Network Problem
-
Restart your computer and network devices:
- Turn off your computer and all network devices (modem, router, etc.).
- Wait for a few minutes and then turn on your modem and router.
- Wait for them to fully power up and then turn on your computer.
-
Disable and enable the network adapter:
- Press Win + X and select Device Manager.
- Expand the Network Adapters category.
- Right-click on your network adapter and select Disable.
- Wait for a few seconds and right-click on the network adapter again, but this time select Enable.
-
Reset TCP/IP stack:
- Open Command Prompt as an administrator.
- Type the following command and press Enter: netsh int ip reset
- Restart your computer.
-
Update network adapter drivers:
- Press Win + X and select Device Manager.
- Expand the Network Adapters category.
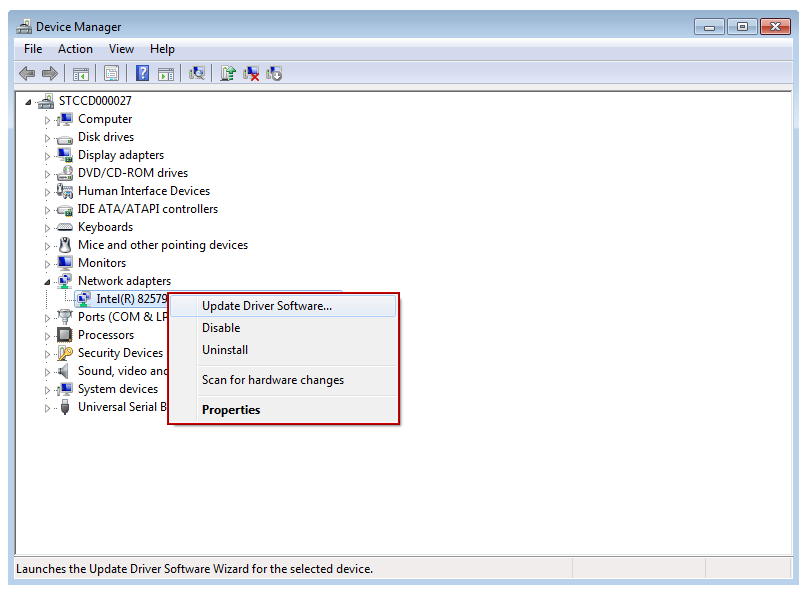
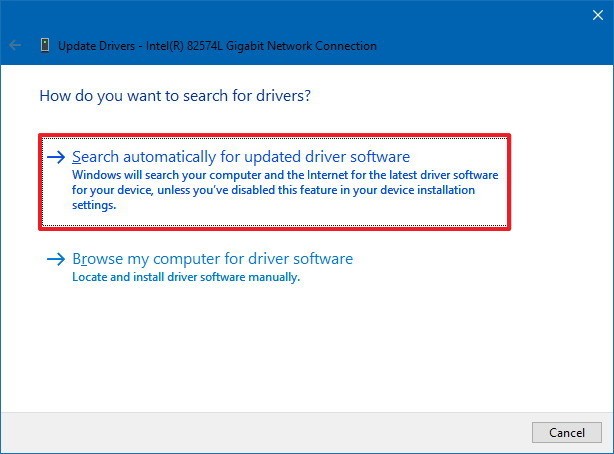
- Right-click on your network adapter and select Update driver.
- Choose the option to search automatically for updated driver software.
- Follow the on-screen instructions to complete the driver update.
-
Disable IPv6:
- Press Win + X and select Network Connections.
- Right-click on your network adapter and select Properties.
- Scroll down and uncheck the box next to Internet Protocol Version 6 (TCP/IPv6).
- Click OK to save the changes.
Checking and Restarting Hardware for Network Issues
To check and restart hardware for network issues in Windows 10/11, follow these troubleshooting steps:
1. First, ensure that all cables are securely connected to your Ethernet adapter and the network device.
2. Check if the network icon in the system tray shows an “Ethernet Unidentified Network” error. If so, right-click on the icon and select “Troubleshoot problems.”
3. If the issue persists, press Windows Key + X and choose “Device Manager” from the menu. Expand the “Network adapters” section and right-click on your Ethernet adapter. Select “Disable” and then “Enable” to restart the hardware.
4. You can also try resetting the IP configuration by opening the Command Prompt as an administrator. Type “ipconfig /release” and then “ipconfig /renew” to refresh the IP address configuration.
5. If none of the above steps work, try resetting the network settings. Go to Settings > Network & Internet > Status. Scroll down and click on “Network reset.” Note that this will remove saved networks and VPN connections.
Turning Off Airplane Mode and Adjusting Network Settings
To turn off Airplane Mode and adjust network settings on Windows 10/11, follow these troubleshooting steps:
1. Click on the network icon in the system tray to open the network settings menu.
2. If Airplane Mode is enabled, click on it to turn it off.
3. Ensure that your Ethernet cable is properly connected to your computer.
4. Right-click on the network icon and select “Open Network & Internet Settings.”
5. In the settings menu, click on “Change adapter options.”
6. Right-click on your Ethernet connection (usually labeled as “Ethernet” or “Local Area Connection”) and select “Properties.”
7. In the Properties window, double-click on “Internet Protocol Version 4 (TCP/IPv4).”
8. Ensure that the settings are set to “Obtain an IP address automatically” and “Obtain DNS server address automatically.”
9. Click “OK” to save the settings.
10. Restart your computer and check if the Ethernet Unidentified Network issue is resolved.
These troubleshooting steps should help you fix the Ethernet Unidentified Network issue on Windows 10/11.
Updating Network Adapter Driver for Improved Connection
To fix the Ethernet Unidentified Network issue on Windows 10/11, updating the network adapter driver can often lead to an improved connection. Here’s how you can do it:
1. Press the Windows key + X and select “Device Manager” from the menu.
2. Expand the “Network adapters” section and find your network adapter.
3. Right-click on the adapter and select “Update driver.”
4. Choose the option to search automatically for updated driver software.
5. Windows will search and install the latest driver for your network adapter.
6. Restart your computer to apply the changes.
Note: If you encounter any network glitches or errors after updating the driver, you can roll back to the previous driver version by following these steps:
1. Open Device Manager again and locate your network adapter.
2. Right-click on the adapter and select “Properties.”
3. Go to the “Driver” tab and click on “Roll Back Driver.”
4. Follow the on-screen instructions to complete the process.
Updating your network adapter driver can resolve connectivity issues and improve your internet access. Make sure to keep your drivers up to date for a smoother online experience.
Releasing and Renewing IP Address
To fix the Ethernet Unidentified Network issue on Windows 10/11, one troubleshooting step is to release and renew the IP address. This process helps resolve network glitches that may be causing the problem.
Here’s how to release and renew the IP address:
1. Press the Windows key + X, then select “Command Prompt (Admin)” or “Windows PowerShell (Admin)” from the menu.
2. In the command prompt window, type “ipconfig /release” and press Enter. This will release the current IP address.
3. Next, type “ipconfig /renew” and press Enter to obtain a new IP address from the network.
4. Wait for the process to complete, then check if the Ethernet Unidentified Network issue is resolved.
This troubleshooting step can help address network errors and restore internet connectivity on Windows 10/11 systems. If the problem persists, we recommend reaching out to our partners for further assistance.
Utilizing Diagnose This Connection Tool
Utilizing Diagnose This Connection Tool
In this article, we will discuss how to fix the “Ethernet Unidentified Network” issue on Windows 10/11 using the Diagnose This Connection tool. This tool is built-in to the Windows operating system and can help diagnose and resolve network connection problems.
Steps to Fix Ethernet Unidentified Network
| Step | Description |
|---|---|
| 1 | Click on the Start menu and type “Network Status” in the search bar. |
| 2 | Open the “Network Status” settings page. |
| 3 | Under the “Change your network settings” section, click on the “Diagnose this connection” link. |
| 4 | The Diagnose This Connection tool will automatically run and attempt to fix any network connection issues. |
| 5 | Follow the on-screen instructions provided by the tool to resolve the “Ethernet Unidentified Network” problem. |
| 6 | Once the tool has completed the diagnosis and fix, check if the “Ethernet Unidentified Network” issue is resolved. |
By utilizing the Diagnose This Connection tool, you can easily troubleshoot and fix network connection problems, including the “Ethernet Unidentified Network” issue on Windows 10/11. If the issue persists, you may need to further investigate your network settings or seek assistance from a network administrator.
Modifying DNS Server and Disabling Fast Startup
To fix the Ethernet Unidentified Network issue in Windows 10/11, you may need to modify your DNS server settings and disable Fast Startup. Here’s how:
Modifying DNS Server:
1. Press Windows key + X and select “Network Connections.”
2. Right-click on your active network connection and choose “Properties.”
3. Select “Internet Protocol Version 4 (TCP/IPv4)” and click “Properties.”
4. Choose the option to “Use the following DNS server addresses.”
5. Enter the preferred and alternate DNS server addresses provided by your ISP or use public DNS servers like Google DNS (8.8.8.8 and 8.8.4.4).
6. Click “OK” to save the changes.
Disabling Fast Startup:
1. Press Windows key + X and select “Power Options.”
2. Click on “Choose what the power buttons do” from the left sidebar.
3. Click “Change settings that are currently unavailable.”
4. Scroll down to “Shutdown settings” and uncheck “Turn on fast startup.”
5. Click “Save changes” to apply the settings.
These steps should help resolve the Ethernet Unidentified Network issue on your Windows 10/11 system. If the problem persists, consider updating your network drivers or seeking further assistance from our technical support team.