Disable Low Disk Space Warning in Windows 10 & 11
Sailing through the vast digital ocean of Windows 10 and 11, it’s time to navigate away from those pesky low disk space warnings. Discover the art of disabling this nagging reminder, as we unveil the key steps to liberate your computing experience.
Understanding Low Disk Space Alerts
When you receive low disk space alerts on your Windows 10 or 11 computer, it means that the available storage on your hard drive is running low. This can impact the performance of your system and may lead to data loss if not addressed. To disable low disk space warnings, you can follow these steps:
1. Press the Windows key + R to open the Run dialog box.
2. Type “regedit” and press Enter to open the Windows Registry Editor.
3. Navigate to the following path: HKEY_CURRENT_USERSoftwareMicrosoftWindowsCurrentVersionPoliciesExplorer.
4. Right-click on an empty area in the right pane and select New, then DWORD (32-bit) Value.
5. Name the new value “NoLowDiskSpaceChecks” and press Enter.
6. Double-click on the newly created value and set its data to “1“.
7. Click OK and close the Registry Editor.
Configuring and Troubleshooting Low Disk Space Alerts
To disable low disk space warning in Windows 10 and 11, follow these steps:
1. Open the Start menu and search for “Regedit” to open the Windows Registry Editor.
2. Navigate to the following path: “HKEY_CURRENT_USERSoftwareMicrosoftWindowsCurrentVersionPoliciesExplorer”.
3. Right-click on the right side of the window and select “New” > “DWORD (32-bit) Value”.
4. Name the new value “NoLowDiskSpaceChecks” and set its value to 1.
5. Close the Registry Editor and restart your computer for the changes to take effect.
By disabling the low disk space warning, you won’t receive any alerts when your disk space is running low. Keep in mind that it’s important to regularly monitor your disk space to avoid data loss or system performance issues.
Disabling Low Disk Space Warning Threshold
To disable the low disk space warning in Windows 10 & 11, follow these steps:
1. Open the Start menu and type “disk management”.
2. Click on “Create and format hard disk partitions” from the search results.
3. In the Disk Management window, right-click on the desired volume (typically the C: drive) and select “Properties”.
4. Go to the “Tools” tab and click on “Change Settings” under the “Error Checking” section.
5. Uncheck the box that says “Automatically fix file system errors” and click “OK”.
6. Close the Disk Management window.
Methods to Address Low Disk Space Issues
- Optimize disk usage: Remove unnecessary files, temporary files, and unused programs to free up disk space.
- Empty the recycle bin: Permanently delete files from the recycle bin to reclaim disk space.
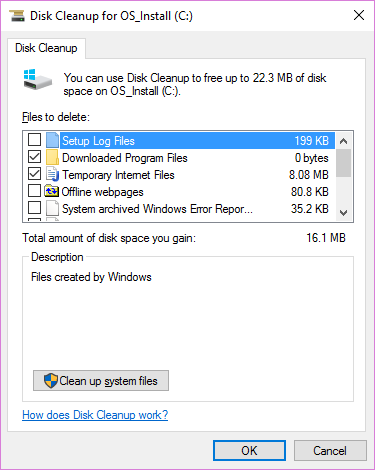
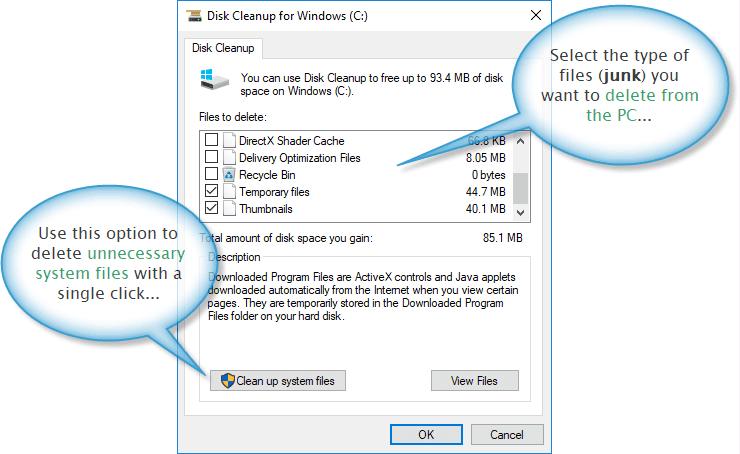
- Run Disk Cleanup: Use the built-in Disk Cleanup tool to remove system files, temporary files, and other unnecessary data.
- Disable hibernation: Turn off the hibernation feature to free up disk space used by the hiberfil.sys file.
- Move files to an external storage: Transfer large files or folders to an external hard drive or cloud storage to free up space on the local disk.
- Extend disk partition: If available, expand the disk partition to increase the overall disk space.
- Uninstall unused programs: Remove software applications that are no longer needed to reclaim disk space.
- Disable System Restore: Temporarily disable or reduce the allocated disk space for System Restore to free up storage.
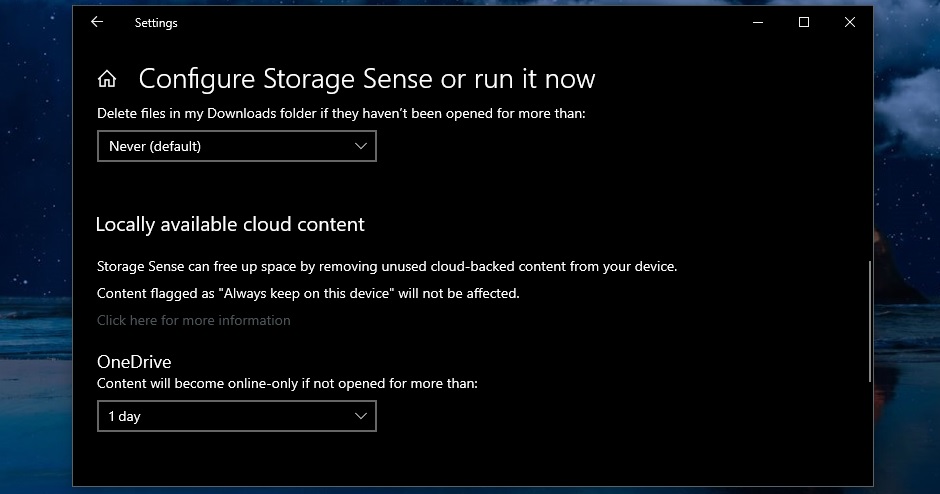
- Use Storage Sense: Enable the Storage Sense feature to automatically free up disk space by deleting temporary files and content in the Downloads folder.
- Move default file locations: Change the default save locations for documents, pictures, and other files to a different disk or partition.